Why Concrete Moisture Testing Is Crucial for Flooring Installers
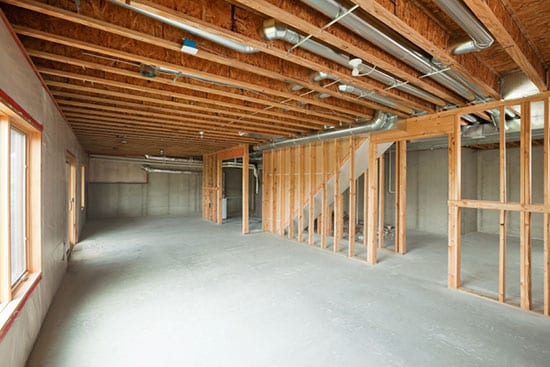 When installing a floor covering over a concrete subfloor, concrete moisture testing is crucial. This step helps guarantee a successful installation and enhances the floor’s longevity, as the concrete is an integral part of the flooring structure.
Otherwise, you put the floor at risk for adhesive failures, warping, and mold growth—the last things you want to deal with!
Aside from helping you avoid costly repairs, concrete moisture testing also ensures that you’re complying with industry standards and extending the lifespan of the floor. By doing so, you build a positive reputation and set yourself up for repeat clients.
Here, we’ll look at things you need to know about concrete moisture testing, including:
- Sources of concrete moisture
- Common methods of concrete moisture testing
- Preparing your slab for moisture testing
- Addressing excess moisture
Let’s begin by understanding where concrete moisture comes from and how that makes it necessary to test the slab.
Sources of Concrete Moisture
Moisture in concrete originates from two primary sources: the hydration process and external sources.
The hydration process
Water is part of the process of making concrete, reacting with cement to form a solid matrix. There are literally tons of water in each concrete slab that still have to evaporate out of it after it hardens (cures). A hard slab is not necessarily a dry slab.
Excess moisture within the concrete slab migrates to the top of the slab and dries off the surface over time, eventually reaching equilibrium with the surrounding environment.
But if the concrete hasn’t dried sufficiently before installation, that moisture will continue to affect whatever is above it, including a floor covering.
External Sources
Although there should be a vapor retarder under the concrete, concrete moisture problems can also come from external sources, such as groundwater, rain, or humidity—especially if there is a compromise in the vapor retarder.
Excess moisture, regardless of the source, can adversely affect flooring installations, causing adhesive failures, floor warpage and buckling, mold and mildew growth, and other dimensional changes in flooring materials that will be unacceptable to the owner.
That’s why it’s important to test for moisture in the concrete slab with an accurate method.
Common Methods of Concrete Moisture Testing
Flooring installers have three main options for concrete moisture testing: (1) the calcium chloride test, (2) concrete moisture meters, and (3) relative humidity testing.
These methods vary in their accuracy and depth—something important to understand when selecting the most appropriate test. Let’s look at each one, including the process involved and the tools needed.
Calcium Chloride Test
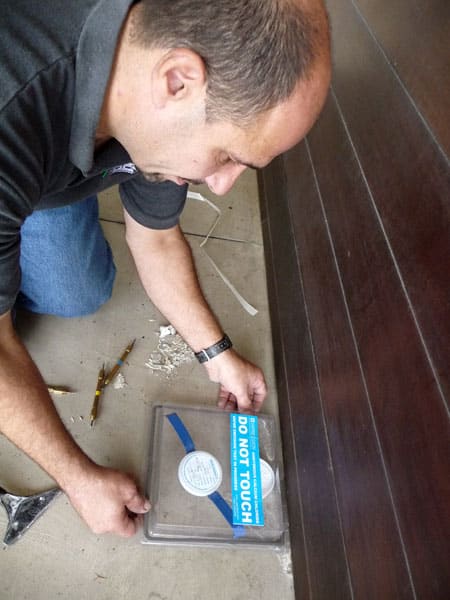 The calcium chloride test, frequently referred to as the moisture vapor emission rate (MVER), is a conventional technique for assessing concrete moisture levels. Compliant with the ASTM F1869 standard, it involves placing a container of calcium chloride on the concrete surface and sealing it.
The moisture emitted from the concrete and absorbed by the calcium chloride is then measured over a specified period of time. The test requires about 72 hours to get results.
Typical calcium chloride test kits include a sealed container, calcium chloride salt, and a plastic cover to secure the setup on the concrete surface. In addition, you may need a vacuum cleaner for removing dust and debris and protective gear for doing the tests.
The testing process entails cleaning the test area, using the pre-measured amount of calcium chloride provided in the kit, sealing it over the concrete surface, allowing it to sit for the predetermined duration, and then reweighing the calcium chloride to determine the moisture vapor emission rate.
The downside of the calcium chloride test is that it only provides an understanding of the moisture on the surface of the concrete. It doesn’t give an accurate picture at deeper depths. For this reason, ASTM F1869 no longer allows calcium chloride testing for lightweight concrete because it doesn’t give adequate results.
This limitation is mainly due to the fact that the surface of a slab dries more rapidly than its interior, leading to a moisture gradient from the surface to the bottom of the slab. Without considering this gradient and obtaining readings at various depths, the test’s accuracy and validity are questionable, prompting many industry professionals to seek alternatives.
Concrete Moisture Meters
Concrete moisture meters use electrical impedance and resistivity to test for moisture in a slab.
However, concrete moisture meters, like the calcium chloride test, can only evaluate surface moisture levels.
In addition, concrete moisture meters are largely affected by different concrete mixes. Some major factors are:
- The density of the concrete slab
- The type of aggregate used
- The size of the aggregate
- Mix ratios of any of the components making up the concrete
- Additives used in the concrete mix
If the meter is calibrated to one mix, it can show huge errors on other mixes.
However, there is one area where concrete moisture meters have become particularly beneficial. These meters help identify moisture “hotspots,” or areas within the concrete that exhibit higher moisture content compared to surrounding areas. By detecting these hotspots, users can strategically place other types of tests, such as relative humidity testing, for more accurate and comprehensive assessments.
And any particular slab will likely be made of the same mix from one location to another so the meters work well in comparing one part of a slab to another.
When considering the purchase of a concrete moisture meter, it’s best to get the meter that exhibits the least amount of errors in product testing. The Wagner C555 has been shown to have about half the errors of other leading meters.
Now, onto the next methodology.
Relative Humidity Testing
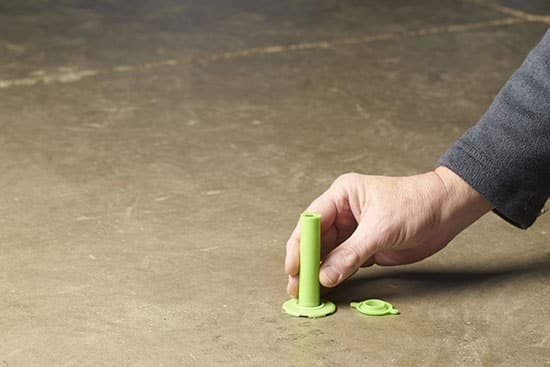 Relative humidity (RH) testing, governed by the ASTM F2170 standard, is a widely used method for assessing moisture levels within a concrete slab. It involves drilling into the concrete at 40% depth (if drying from one side) or 20% depth (if drying from both sides) and placing in-situ probes.
Once the sensors/probes are installed, they need to equilibrate for at least 24 hours (per the F2170 standard) before measurements can be taken. This period is much shorter than the 72 hours required for the calcium chloride test!
Additional equipment and supplies may include drills and bits for creating test holes, vacuum cleaners for removing dust and debris, and protective gear for ensuring safety during testing procedures.
A major benefit of this test is its ability to give a better overall picture of moisture in the concrete slab.
When concrete is first poured, it has the same RH throughout the slab. But as it dries, it
forms a gradient: less moisture on the top and more moisture on the bottom.
And that could have a huge impact on flooring installations.
Why? The slab can look dry, and the calcium chloride test or concrete moisture meters could indicate that it’s dry.
But it could still be harboring deeper moisture that will slowly come to the top and seep into the floor above. With RH testing, the probes can detect that deeper moisture so you know how much moisture will eventually surface. No moisture surprises later on!
So, once you know what test you plan to use, how should you prepare the slab for moisture testing?
Preparing for Concrete Moisture Testing
Before carrying out moisture tests, adhere to the following guidelines to ensure proper preparation of your concrete slab:
Allow the concrete slab ample time to cure
The curing process is crucial for the concrete to achieve its desired strength and durability. Typically, a curing period of at least 28 days is recommended, but it may vary depending on factors such as mix design, temperature, and humidity.
Evaluate the testing environment
Take into account factors such as ambient temperature, humidity, and the age and condition of the concrete slab. Be aware that environmental conditions may influence test outcomes. For example, high humidity levels can prolong the drying time of the slab, while extreme temperatures may affect the curing process.
Choose test locations
Select locations that are evenly dispersed across the slab, paying particular attention to areas susceptible to moisture issues, such as those near exterior walls, plumbing, or drainage systems.
The ASTM F2170 standard recommends a minimum of three tests for the first 1,000 square feet of the concrete slab, with one additional test site for each additional 1,000 square feet or fraction thereof.
Clean and prepare test sites
Remove any surface contaminants, such as dust, debris, or existing coatings, to ensure accurate measurements. In some cases, it may be necessary to grind the surface of the concrete to expose a fresh layer for testing.
Follow the test procedures as outlined in the respective test methods
Adhering to the recommended testing protocols is essential for obtaining accurate, reliable results. This includes using the appropriate equipment, maintaining consistent testing conditions, and allowing for sufficient testing durations.
Addressing Excess Moisture Issues
If test results indicate excess moisture, you may need to install a moisture mitigation system or allow the slab more time to dry. A dehumidification system can speed up the drying process.
Selecting moisture-resistant flooring materials, like vinyl, tile, or polished concrete, can also help minimize the risk of moisture-related issues.
Be sure to follow manufacturer guidelines and industry best practices when it comes to acceptable relative humidity levels for your slab before installation. Often, what matters most is allowing the slab sufficient time to dry before you place a floor covering on top, unless you’re willing to spend a lot of money on mitigation.
Protect your floor installations with concrete moisture testing
Concrete moisture testing is an indispensable aspect of floor installations that helps prevent costly failures, improves the performance and longevity of the floor, and ensures compliance with industry standards.
Yes, it may require an investment of time and resources to get an accurate picture of the slab’s moisture conditions. But doing so will save you much more time and resources in the long run!
So why not do it right and protect your floor installations from the start?
Learn about our Rapid RH system of concrete moisture testing and how it can help you do just that!

Wagner Meters is a family-owned American business that aims to provide solutions in moisture measurement technology that will enhance the quality and value of each customer’s project. With an almost 60-year legacy of innovation, Wagner continues to be a resource for both individual craftsmen and high-performance commercial endeavors.
Last updated on March 4th, 2025

