Tips for RH Moisture Testing in Concrete
Is anything more frustrating than doing the hard work only to fail the test? And to fail a concrete moisture test? How does that happen?
Well, there are plenty of reasons it could happen. Conducting concrete moisture tests should be simple. Once you get the testing process down, you can focus on the results. Done right, a test that shows the concrete slab’s moisture condition is too high to install the floor covering isn’t a failure. It’s valuable information that keeps you from installing the floor covering too early.
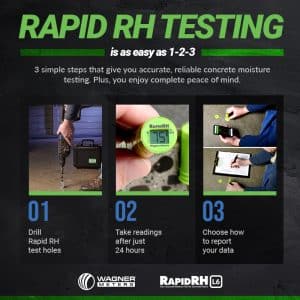
In this article, we’ll give you the tips you need to be successful:
- #1 Use the Right Testing Method
- #2 Know the Depth at which You Need to Drill
- #3 Remove Dust and Debris from the Drilled Area Before Installing Your RH Moisture Sensor
- #4 Perform the RH Moisture Test on Concrete under the Right Environmental Conditions
- #5 Collect and Preserve the RH Readings
- Other Moisture Concrete Tests
- How to Test Concrete for Moisture Made Simple
Installing the covering too early leaves the floor and you vulnerable to moisture-related failure. As the excess moisture seeps upwards, it can damage whatever flooring you installed. Hardwood can warp, buckle, and crack. Other types of floor coverings could delaminate, bubble, and discolor. A lot can go wrong with any covearing installed over a concrete slab holding too much moisture.
We put together 5 tips on testing concrete for moisture to help you execute an accurate moisture test simply and reliably every time.
Tip #1 Use the Right Testing Method
The most effective way to measure moisture in concrete is with an in-situ relative humidity (RH) test. The in-situ RH method is the only option validated through scientific testing to measure the concrete’s moisture condition accurately.
If you comply fully with the guidelines spelled out in ASTM F2170 (Standard Test Method for Determining Relative Humidity in Concrete Floor Slabs Using in-situ Probes), you’ll be assured of getting accurate moisture data using the RH test.
You have a choice between single-use and reusable RH sensors. Both provide reliable RH test results. Yet both aren’t suitable options for everyone. Most people will find the single-use RH sensor is the right option. It’s easier to manage and doesn’t require care during removal.
A reusable sensor has higher labor costs, partly because it must be removed carefully and checked regularly for proper calibration. Reusable sensors also need to get recertified each year. You want to reuse each sensor for as long as possible to lower the cost per test.
However, annual recertification adds to its costs and management. The Wagner Meters Rapid RH® 5.0 Reusable sensor is unique as it comes with the EasyCare CalCheck storage unit for performing fast and easy calibration checks of the sensors.
Get a detailed look at all the comparative advantages and disadvantages of reusable and single-use RH sensors here.
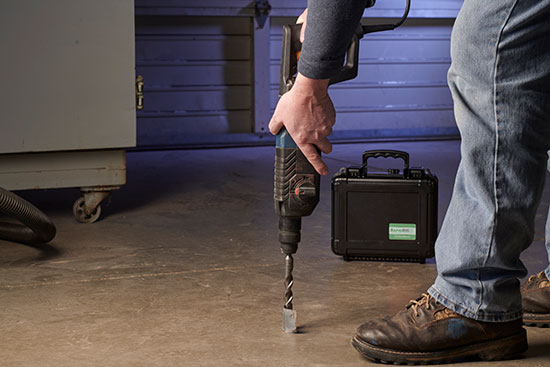
It’s extremely important to drill to the correct depth in order to ensure accurate RH test results.
#2 Know the Depth at which You Need to Drill
Researchers at Lund University in Sweden conducted some of the earliest scientific studies of the modern RH moisture test. Many of their discoveries formed the basis of the ASTM F2170 standard.
Their research discovered that moisture doesn’t distribute uniformly inside a drying concrete slab. Instead, a moisture gradient tends to form. They also determined that how moisture evaporates and is distributed within the slab dictates the precise depth at which you must drill the RH test hole to assess its internal relative humidity.
Their findings make your decision easy. If the slab is at or below grade with a vapor retarder on the ground, you need to drill the RH moisture sensor hole down to 40% depth. In these circumstances, moisture only escapes from the concrete slab from one side. That’s why you also want to drill to 40% depth on an elevated slab poured in a metal pan deck.
Any slab drying from both sides requires drilling the test hole to 20% depth to place the RH moisture sensor.
You calculate the depth from the bottom of the test hole to the slab’s surface since the RH sensor will sit at the bottom of the drilled hole.
#3 Remove Dust and Debris from the Drilled Area Before Installing Your RH Moisture Sensor
Tip #2 makes clear you need to drill the hole to the proper depth. If you don’t do that, nothing else you’re doing matters. Drilling, of course, will make a small mess inside and around the hole. You need to clean this up before inserting the RH sensor.
If you don’t fully clean the hole and its surroundings before inserting the RH sensor, some debris will get stuck around it. When that happens, the RH moisture test for concrete may not perform optimally.
Use a small wire brush to loosen any materials in the hole. Then use a narrow vacuum attachment that fits in the hole to clean up the debris in and around it. A vacuum drill bit that will vacuum as you drill makes the process even faster.
#4 Perform the RH Moisture Test on Concrete under the Right Environmental Conditions
ASTM F2170 requires the site to be at service conditions to take an official RH moisture test reading. That’s the first reason to ensure you’re testing under the right environmental conditions.
If that means waiting for the building to be enclosed with operational HVAC, you must wait. You can’t take an ASTM F2170-compliant RH test if you don’t.
RH tests must be conducted under service conditions because RH is sensitive to ambient conditions, including air temperature, slab temperature, and humidity. Only an RH moisture test done under service conditions can tell you whether the slab has reached the moisture condition that won’t put you at risk of moisture-related damage after you’ve installed the floor covering.
ASTM F2170 also requires 24 hours after installing an RH sensor to take an official reading. The waiting period allows the sensor to equilibrate within the concrete slab.
If you’re using a Wagner Meters Rapid RH® sensor, you can take a reading as quickly as 15 minutes after inserting the sensor into the slab and get a reasonable indication of the reading you’ll get at 24 hours—testing shows that the Rapid RH® sensors reliably give a reading within 3% of an official 24-hour reading. This reading is a tool to help you plan. However, you can’t use it on an official ASTM F2170 report.
#5 Collect and Preserve the RH Readings
The exact process you need to capture the RH readings depends on the sensor you’re using. We designed the Rapid RH® sensors for quick and easy data collection. You don’t need to use pen and paper to write out each reading, link it to the specific sensor and location, and manage the data digitally.
Instead, you can use one of the Bluetooth-enabled readers from Wagner Meters to collect the RH readings and deliver them to a free mobile app. If you’re using the Rapid RH® L6 RH sensor, the Total Reader® and DataMaster™ L6 app help you organize RH readings. The Bluetooth® Smart Reader and DataMaster™ 5.0 do the same for anyone working with the Rapid RH® 5.0 Reusable RH sensor.
Both readers and mobile apps also prepare ASTM F2170 reports for you. They provide various sensor data and project management tools that eliminate paperwork. The whole Rapid RH® data collection process ensures data integrity and easy recall when needed.
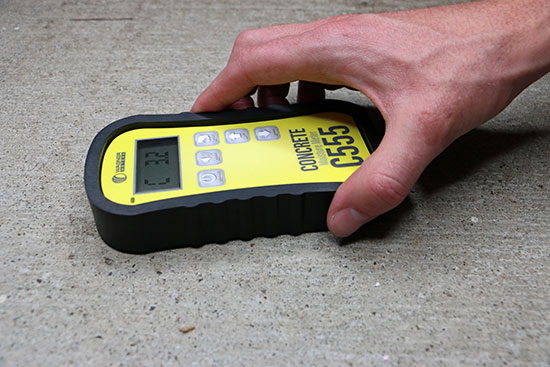
A concrete moisture meter is useful for choosing where to conduct RH moisture tests.
Other Moisture Concrete Tests
The RH moisture test isn’t the only test on the market to measure concrete moisture. But it is the only one that gives you the reliable information you need to know whether you can safely install the floor covering.
The calcium chloride test, also called the Moisture Vapor Emissions Rate (MVER) test, is still used. The MVER test only measures moisture on the slab’s surface. The research done at Lund University and by CTLGroup explains why it’s necessary to know the moisture condition within the slab. You can’t learn about the moisture inside the concrete by measuring only surface moisture.
A concrete moisture meter can help you find high moisture spots on the slab. It can’t give you a precise RH reading. Consequently, it’s a useful tool for choosing where to conduct RH moisture tests.
How to Test Concrete for Moisture Made Simple
You have good reason to comply with ASTM F2170 to test for concrete moisture. Conducting an RH moisture test on concrete is your strongest weapon against installing flooring on a slab holding too much moisture. Documenting compliance with F2170 is your best defense against potential liability if a moisture-related flooring failure occurs.
Use our ASTM F2170 checklist to stay on track when doing RH moisture tests. Also, ensure you’re using the right RH testing tools for the job. The single-use and reusable Rapid RH® sensors are part of a suite of Rapid RH® products that simplify the RH test process and data management. Learn more about the complete line of Rapid RH® products here.
Jason has 20+ years’ experience in sales and sales management in a spectrum of industries and has successfully launched a variety of products to the market, including the original Rapid RH® concrete moisture tests. He currently works with Wagner Meters as our Rapid RH® product sales manager.
Last updated on February 5th, 2025



Great article. I wish I could get everyone in our industry to read this.
Great information as always