Woodworking 101: Essential Tools, Skills, and Techniques

Your skill level will determine the type and complexity of the tools you need.
New to the world of woodworking? But unsure what you need to know to bring your projects to life?
Jumping into this hobby may be daunting, but we’ve developed this guide to simplify the process. Here, you’ll learn the basics of what it takes to turn your ideas into beautiful and functional works of art. We’ll walk through the process of woodworking in the order the steps occur:
- Essential tools for woodworking
- Wood selection
- Measuring and marking
- Cutting and joining
- Sanding and finishing
Essential Tools
One of the first steps in woodworking is having the right tools on hand, as they are foundational to your project. Once you invest in some good-quality tools, you’ll be set to go for many projects.
Here are some specific factors to keep in mind as you begin shopping:
- Skill level: Your skill level will influence the type and complexity of the tools you need. Beginners might start with basic hand tools, while more advanced woodworkers may require specialized or power tools.
- Types of projects: If you primarily work on small-scale projects like carving or making wooden toys, you may need different tools than someone who builds furniture or cabinetry.
- Budget: Invest in high-quality tools for better performance and durability, but remember that it’s possible to build up your collection over time.
- Space: Consider the amount of workspace you have available when selecting tools. Some tools, like large power tools or benchtop machines, require more space than hand tools.
- Safety: Prioritize tools with safety features, especially when using power tools. Look for features like blade guards, anti-kickback mechanisms, and automatic shut-offs.
- Tool quality: Opt for tools made from high-quality materials with solid construction. High-quality tools are more durable, precise, and efficient, making them a worthwhile investment.
- Ergonomics: Choose tools with comfortable grips and ergonomically designed handles to reduce hand fatigue and improve overall comfort during use.
- Versatility: Look for tools that can perform multiple tasks. They will save you money and workshop space.
- Maintenance: Consider the maintenance requirements of the tools you choose. Some tools, like hand planes or chisels, require regular sharpening, while others may need more complex maintenance.
- Reviews and recommendations: Research tools by reading reviews and seeking recommendations from experienced woodworkers. This will help you find reliable tools that have proven performance and durability.
As you begin building up your workshop, here are some categories to consider:
- Cutting tools
- Shaping tools
- Assembly tools
- Sanding and finishing tools
- Power tools
Cutting tools
- Hand saw: A general-purpose hand saw is suitable for making rough cuts and crosscuts in wood. There are different types of hand saws, such as rip saws and crosscut saws, designed for specific cuts.
- Coping saw: A coping saw has a thin, narrow blade and is used for making intricate cuts or cutting curves and shapes.
- Chisels: Chisels are used for cutting and shaping wood, particularly in joinery work. A set of bevel-edge chisels in various widths is ideal for most woodworking projects.
- Utility knife: A utility knife is useful for trimming and cutting veneer, marking lines, or cutting various materials in the workshop.
Shaping tools
- Hand plane: A hand plane is used to flatten, smooth, or shape wood surfaces. Bench planes (such as a No. 4 or No. 5) are common for general-purpose work.
- Block plane: A block plane is a smaller plane used for trimming, chamfering edges, and fine-tuning joinery.
- Wood rasp: A wood rasp is a shaping tool with coarse teeth used to remove material quickly, especially when working with curves or irregular shapes.
- Files: Files come in different shapes and sizes and are used for refining and smoothing surfaces after using a rasp or other shaping tools.
Assembly tools
- Hammer: A claw hammer is useful for driving nails and removing them, while a wooden or rubber mallet is suitable for assembling joints without damaging the wood.
- Wood glue: Wood glue is essential for creating strong, lasting bonds in woodworking joints.
- Clamps: Clamps hold workpieces together while the glue dries or during assembly. Various types of clamps, such as bar clamps, C-clamps, or F-clamps, are available for different applications.
- Screwdrivers: A set of screwdrivers with different tips (flathead and Phillips) is necessary for driving screws during assembly.
Sanding and finishing tools
- Sandpaper: Sandpaper in various grits (coarse to fine) is used to smooth and prepare wood surfaces for finishing.
- Sanding block: A sanding block holds the sandpaper and provides even pressure for consistent results.
- Finishing products: Wood stain, varnish, or other finishing products are applied to protect and enhance the appearance of the wood.
Some woodworking projects will require bigger and more complex tools. You’ll eventually want to invest in some of the following power tools.
Power Tools
Power tools are electric or battery-operated tools that use a motor to perform tasks faster, easier, and with greater precision than their manual counterparts. They are designed to save time, and effort, and increase productivity in woodworking and other construction projects. Let’s discuss some common power tools and how they make your work more efficient:
Drills
Power drills are versatile tools used for drilling holes in various materials, including wood, metal, and plastic. They also function as screwdrivers with the appropriate attachments. With adjustable speed settings, power drills offer increased control and precision compared to manual hand drills.
Saws
Several types of power saws are available, each designed for specific cutting tasks:
- Circular saw: A circular saw is a handheld power tool with a spinning blade used for making straight cuts in wood, metal, or plastic. It’s faster and more accurate than a hand saw.
- Jigsaw: A jigsaw is a handheld saw with a reciprocating blade used for cutting intricate curves and shapes. It’s more efficient and precise than a coping saw.
- Miter saw: A miter saw is a bench-mounted saw used for making accurate crosscuts and angled cuts (miters). It’s quicker and more precise than using a hand saw and miter box.
- Table saw: A table saw is a stationary power tool with a circular blade mounted on a table. It’s used for making precise rip cuts, crosscuts, and dadoes, offering speed and accuracy that hand saws cannot match.
Sanders
Power sanders make the process of sanding wood surfaces faster and more efficient. Some common types of power sanders include:
- Orbital sander: An orbital sander is a handheld tool that uses a circular sanding pad to smooth surfaces. It’s suitable for general sanding tasks and provides a more consistent finish than manual sanding.
- Belt sander: A belt sander uses a continuous loop of sandpaper to remove material quickly. It’s used for leveling and smoothing rough surfaces and can be handheld or stationary.
Routers
A router is a power tool used for cutting, shaping, and trimming wood, especially for decorative work or joinery. With various bits, a router can create a wide range of profiles and cuts, such as grooves, rabbets, and dadoes. Routers offer speed, precision, and versatility that are difficult to achieve with manual tools.
As you gain experience in woodworking, you’ll likely find that a combination of hand tools and power tools will help you achieve the best results in your projects.
But we’ve only scratched the surface here when it comes to tools. Check out our top 40 woodworking tools article for a more in-depth list.
Wood Selection

The type of wood you choose will largely depend on the nature of your woodworking project and what you’re building.
When it comes to woodworking, the type of wood you choose will depend on what you’re building. From hardwoods, such as oak and maple, to softwoods like pine and cedar, each type of wood has its own unique characteristics and benefits. They will vary in strength, durability, grain pattern, color, and cost.
Here are examples of some popular types of wood:
Pine
- Strength: Low to medium strength. It is easy to work with and is suitable for light-duty construction projects or furniture pieces that won’t be subjected to heavy loads.
- Durability: Low natural resistance to decay and insect damage. It is typically not recommended for outdoor use without proper treatment.
- Grain: Straight grain pattern with a uniform texture.
- Color: Creamy white to light yellow or pale brown.
- Cost: One of the most affordable and widely available wood species. It’s an excellent choice for budget-conscious projects.
Oak
- Strength: Excellent strength, making it suitable for heavy-duty furniture, flooring, and construction projects.
- Durability: Good natural resistance to decay and insect damage. It can be used for outdoor projects, but proper sealing is recommended to enhance its longevity.
- Grain: Prominent and distinctive grain pattern with a coarse texture.
- Color: Light tan to medium brown with a red or pink hue.
- Cost: Moderate, making it an attractive option for a wide range of woodworking projects.
Maple
- Strength: A hardwood with high strength, making it suitable for heavy-duty furniture, cabinetry, and flooring projects.
- Durability: Moderate resistance to decay and insect damage. It’s not the best choice for outdoor projects, but it performs well indoors.
- Grain: Fine and uniform grain pattern with a smooth texture.
- Color: Nearly white to light reddish-brown.
- Cost: Moderate, although the more highly-figured varieties can be more expensive.
Cherry
- Strength: Moderate strength, making it suitable for cabinetry, furniture, and other woodworking projects that require a balance of strength and workability.
- Durability: Moderate resistance to decay and insect damage. It’s not the best choice for outdoor projects but performs well indoors.
- Grain: Fine and straight grain pattern with a smooth texture.
- Color: Light pink to reddish-brown with a golden luster that deepens with age.
- Cost: Moderate, although prices may vary depending on the quality and availability.
Walnut
- Strength: Moderate strength, making it suitable for furniture, cabinetry, and other woodworking projects that require a balance of strength and workability.
- Durability: Good natural resistance to decay and insect damage. It can be used for outdoor projects with proper sealing and treatment.
- Grain: Straight grain pattern with a medium to coarse texture.
- Color: Light to dark brown with a rich, chocolatey hue and occasional purple or reddish undertones.
- Cost: More expensive than many other wood species, making it a premium choice for high-end projects.
Once you’ve chosen your wood, you’re ready to begin your project. So, grab your plans and your measuring and marking tools—we’re heading to the workshop.
Measuring and Marking
Measuring and marking allow you to be precise and accurate in your projects. And numerous tools, both traditional and digital, help in this process. Let’s take a look at what some of those are, followed by techniques for using them.
Measuring Tools
Before we delve into the specific techniques, here are some of the most commonly used measuring tools in woodworking:
- Tape measure—A tape measure is available in different lengths and has a locking mechanism that allows you to keep the tape in place while taking measurements.
- Ruler—Woodworkers use rulers for measuring things that require more precision than a tape measure. They are typically available in lengths ranging from 6 inches to 12 inches.
- Combination square—A combination square consists of a ruler with a 90-degree angle at one end and an adjustable blade at the other. It’s used for measuring angles, making 90-degree cuts, and checking the squareness of a workpiece.
- Calipers—Calipers measure the internal and external dimensions of a workpiece with great accuracy. They are available in both digital and analog versions.
Now for some marking tools.
Marking
Markings serve as a guide for cutting, drilling, and shaping the wood. That’s why you’ll want to look for marking tools that are well-made, durable, and accurate. A high-quality marking tool will not only improve the accuracy of your work but also last longer and be more comfortable to use.
You’ll also want to consider the type of project you’ll be working on. For example, a marker will probably show up better on dark wood than a pencil will. Or, if you’re working on a project with intricate details, a scribe may be more suitable.
Here are all your options:
- Pencils—Pencils are versatile, easy to use, and can be sharpened to maintain their precision. Pencils with harder lead, such as H or F, are preferred as they make fine, visible lines.
- Scribes—Scribes are used for marking lines in wood that will be cut or carved. They have a sharp point that can be used to scratch a line into the surface of the wood. They work well on irregular surfaces and for fine details.
- Awls—Awls are used for marking and starting holes in wood. They have a sharp, pointed tip that can be used to make small indentations on the surface of the wood to guide the drill bit or saw blade when making cuts.
- Knives—Marking knives are used for scoring lines on the wood surface before cutting. They have a sharp, beveled edge that creates clean, precise lines, especially for joinery and other detailed work. A marking knife is handy when you need a well-defined line that will not smudge or fade, as might happen with a pencil or marker.
Measuring Techniques
As you use your measuring and marking tools, keep these general principles in mind:
- Measure twice, cut once. Once you’ve cut a piece of material, there’s no going back. So you might as well double-check that you’re cutting the right amount!
- Use a sharp pencil. A blunt pencil may not show up well, causing you to cut or attach something in the wrong place. Some people skip the pencil and just mark directly with a blade on the wood, which may be a good technique when you need to chisel up to a certain point or make a saw cut on a line.
- Check for squareness. Use either a combination or a precision square for this.
- Measure to the inside or outside edge. When measuring the length of a workpiece, always measure to the inside or outside edge rather than the center. This will ensure that your cuts are accurate and that the final product fits together properly.
And speaking of cutting and fitting pieces together, we’re heading there next!
Cutting and Joining
Once you’ve measured and marked your pieces, you’re ready to move on to the exciting part: cutting the pieces and joining them together. Your project is about to take shape!
Cutting Techniques

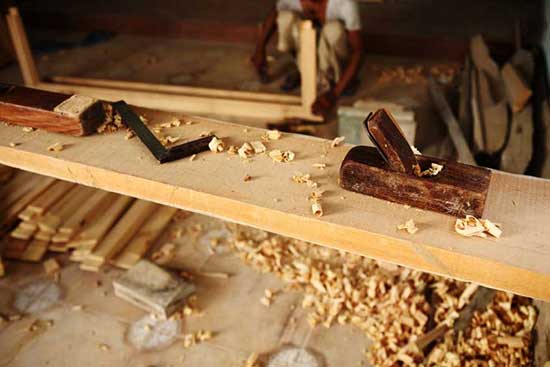
Planing or smoothing the surface of the wood can be done with either a hand tool or a power planer.
The types of cuts you make will depend on the type of project you’re working on and its complexity. Sometimes, the techniques are also just a matter of preference.
Here are some common ones:
- Sawing—You have many types of saws to choose from, depending on your purpose. A handsaw, for example, is used for cutting straight lines, while a coping saw is used for cutting curves. Pick a jigsaw to cut complex shapes and a band saw for precision cuts.
- Chiseling—A chisel is a sharp tool with a beveled edge that shapes and removes wood to make straight, angled, or curved cuts. Chisels come in various shapes and sizes and can be used for a variety of tasks, such as creating mortises or carving intricate designs.
- Routing—Routing is a technique that involves using a router to remove wood from the surface of a workpiece. This shapes, edges, and trims the wood. There are many types of router bits that can be used to create various profiles and shapes.
- Planing—Planing, or smoothing the surface of a workpiece, is a technique that can be done with a hand plane or a power planer. Hand planes are great for finer touches, while power planers can remove large amounts of material quickly.
- Turning—This technique, accomplished with a tool called a lathe, is used for creating rounded shapes, such as spindles, bowls, and vases. You can attach various chisels and gouges to the lathe to create different shapes and profiles.
With pieces cut, it’s time to join them.
Joining Techniques
From nailing and screwing to gluing and doweling, joining techniques bring your pieces together securely and precisely. Each technique has its own advantages and disadvantages, which we’ll point out below.
You’ll probably end up using a combination of the following:
- Nailing and screwing are popular joining techniques that involve using metal fasteners to attach two pieces of wood together. These techniques are relatively quick and easy to execute, but they can weaken the wood over time and may not be suitable for certain types of projects.
- Gluing involves the use of adhesive to bond two pieces of wood together. This method provides a strong, permanent bond that is often preferred for furniture and cabinetry projects. However, it can be difficult to undo and may not be the best choice for projects that require disassembly or repair.
- Doweling is a technique of drilling holes into pieces of wood and inserting dowels, small cylindrical wooden pieces, to hold them together. This method creates a strong, accurate joint and is common for furniture and cabinetry projects. If you choose this route, keep in mind that it requires precision drilling and can be time-consuming.
When joining, some woodworkers prefer power tools because they speed up the process and may offer greater accuracy and precision. But they aren’t suitable for all projects.
Hand-powered techniques can be just as effective and may be preferred by some woodworkers who enjoy traditional methods.
In addition to these joining techniques, it’s essential to understand and master various woodworking joints for creating sturdy, lasting, and visually appealing projects. In our comprehensive article, “The Ultimate Guide to Woodworking Joints,” we delve into the anatomy of a woodworking joint, discuss different types of joints, and explore advanced joints for more intricate projects. The article also provides tips for specific projects, addresses common issues, and outlines mistakes to avoid.
By familiarizing yourself with woodworking joints and pairing them with appropriate joining techniques, you’ll be well-equipped to tackle a wide range of woodworking projects. Whether you’re constructing a simple picture frame or designing a custom piece of furniture, understanding the fundamentals of woodworking joints will undoubtedly elevate your craft.
Sanding and Finishing

Use a power sander to speed up the process of sanding wood surfaces.
A woodworking project may be all joined together and look more like what it’s intended to be—such as a fine dining table, a desk, or a patio chair. But it’s not ready for use until it has been sanded and finished. More on both of those steps next.
Sanding Techniques
Sanding removes rough spots, smoothes out uneven surfaces, and prepares your projects for a finish. There are two ways to get the job done:
- Hand sanding provides greater control over the sanding process and can be useful for intricate or curved surfaces. The flip side is that it takes a lot more time and effort, especially with large projects.
- Power sanding uses power tools such as orbital sanders or belt sanders. It can save time and effort but requires proper training and skill to avoid damaging the wood.
The choice of sandpaper grit also plays an important role in sanding techniques. Lower grits, such as 60 or 80, are used for initial sanding to remove rough spots and level uneven surfaces. Higher grits, such as 220 or 320, are used for finishing and achieving a smooth, polished surface.
The direction of sanding also makes a difference. Sanding against the grain can result in scratches and uneven surfaces, so sand with the grain of the wood. For larger projects, it’s important to sand evenly across all surfaces to achieve a consistent finish.
After sanding, the wood is ready for a finish.
Finishing Techniques
Finishes protect your projects and enhance their beauty. You may choose to go for a more natural look, or you may even want a rich, deep finish.
Here are some options and their effects:
- Staining is a popular finishing technique where you apply a colored stain to the wood to enhance its natural beauty. Stains range from light to dark and can be combined to create unique colors. They are often followed by a clear coat of varnish or lacquer to protect the wood and make it last longer.
- Varnishing involves applying a clear coat to the wood to protect it from moisture and other environmental factors. Varnishes come in different sheens, ranging from matte to high gloss, and can be used alone or in combination with a stain.
- Waxing is another finishing technique that involves applying a thin layer of wax to the surface of the wood. This technique provides a soft, natural finish and helps to protect the wood from scratches and other damage. Waxing is often used for antique or vintage furniture pieces.
- Oiling is applying a thin layer of oil to the surface of the wood. Different types of oils, such as linseed or tung oil, can be used.
As you decide what finishing technique to use, consider your type of wood. If you have a beautiful piece of wood with a very attractive grain, you wouldn’t want to hide that with thick, opaque finishes. Instead, opt for a light varnish.
Whether the furniture will be used indoors or outdoors also matters. A piece of wood outdoors will need to be thoroughly sealed from the elements.
And with that, we’ve made it through the woodworking process!
Woodworking is a craft that requires a combination of essential skills, techniques, and tools. In summary, a project from start to finish includes:
- Tool selection
- Wood selection
- Measuring and marking
- Cutting and joining
- Sanding and finishing
From there, you get to enjoy the satisfaction of a job well done! So, go ahead, pick up your tools, and start building your dream projects today!
Learn how woodworkers use technology to work smarter.

Wagner Meters is a family-owned American business that aims to provide solutions in moisture measurement technology that will enhance the quality and value of each customer’s project. With an almost 60-year legacy of innovation, Wagner continues to be a resource for both individual craftsmen and high-performance commercial endeavors.
Last updated on March 20th, 2025


